Saturday, July 23, 2011

Hook to register JS/CSS libraries in Drupal 7

hook_library()

Registers JavaScript/CSS libraries associated with a module.

Modules implementing this return an array of arrays. The key to each sub-array is the machine readable name of the library. Each library may contain the following items:

  • 'title': The human readable name of the library.
  • 'website': The URL of the library's web site.
  • 'version': A string specifying the version of the library; intentionally not a float because a version like "1.2.3" is not a valid float. Use PHP's version_compare() to compare different versions.
  • 'js': An array of JavaScript elements; each element's key is used as $data argument, each element's value is used as $options array for drupal_add_js(). To add library-specific (not module-specific) JavaScript settings, the key may be skipped, the value must specify 'type' => 'setting', and the actual settings must be contained in a 'data' element of the value.
  • 'css': Like 'js', an array of CSS elements passed to drupal_add_css().
  • 'dependencies': An array of libraries that are required for a library. Each element is an array listing the module and name of another library. Note that all dependencies for each dependent library will also be added when this library is added.

Registered information for a library should contain re-usable data only. Module- or implementation-specific data and integration logic should be added separately.

Return value

An array defining libraries associated with a module.

Usage

If you want to call drupal_add_library() in node add / edit pages, following approaches can be used.

Method 1:

function MODULE1_form_alter(&$form, &$form_state, $form_id) {
if (isset($form['#node_edit_form']) && $form['#node_edit_form') {
drupal_add_library('MODULE', 'LIBRARY');
}
}

This should ensure the library is loaded whenever a node form is displayed.

Method 2:

Using the ‘#attached’ attribute in hook_form_BASE_FORM_ID_alter

function MODULE1_form_node_form_alter(&$form, &$form_state) {
$form['#attached']['library'][] = array('MODULE', 'LIBRARY');
}

If you are modifying, or outputting a form, you can use the #attached attribute, which is described as "allows loading of CSS, Javascript, libraries, or custom types when the form is built".

Sunday, August 29, 2010

Droopal


The Droopal module offers out of the box support for writing modules in full OOP and accessing other modules via OOP. While not all developers wish to have this functionality, this module is targeted at those who do. Here are some examples of what you can do out of the box, all with zero configuration:


Access any core module using OOP:


<?php
  ModNode
::load()
?>


This would be the equivalent of:


<?php
  node_load
()
?>


Access any core include using OOP:


<?php
  LibCommon
::drupal_add_css()
?>


This would be the equivalent of:


<?php
  drupal_add_css
();
?>


Access any non-core module or include using OOP:


<?php
  ModImagecache
::action_save
?>


This would be the equivalent of:


<?php
  imagecache_action_save
()
?>


Write custom modules using OOP structures:


<?php
 
class ModMyModule {
   
// hook_menu
   
function menu() {
     
//etc...
   
}
   
// hook_nodeapi
   
function nodeapi() {
     
//etc...
   
}
  }
?>


The functionality to make this work is completely hidden and offered at virtually no performance hit. All existing Drupal APIs also remain completely intact.


WARNINGS


  • This module will safely modify your core Drupal files.


  • Upon un-installation, this file will safely restore your core Drupal files, provided you follow the instructions below.


  • If any of the installation instructions below do not make sense to you, don't make assumptions. As with any module, know what you are doing before installing this module.


  • This module has only been designed to work on UNIX based systems.


INSTALLATION INSTRUCTIONS


  1. As always, backup your important files


  2. Make sure the "patch" utility is installed and accessible from from your PHP scripts. This is VERY IMPORTANT. On most OSX, Linux, and Unix Variants the "patch" utility will be installed and accessible by default from PHP.


  3. Download and unzip the module into your modules directory like any other module


  4. Set the permissions to be writeable by your webserver for the following files:

    • includes/menu.inc

    • includes/module.inc

    • includes/theme.inc

    • modules/node/node.module

    • modules/user/user.module


    • sites/all/files or sites/default/files


    THESE PERMISSIONS MUST ALSO BE SET FOR UNINSTALLATION TO SUCCEED


  5. Activate module "Droopal"


  6. For testing and examples, activate module "Droopal Demo OOP", which can

    be compared and contrasted with the module, "Drupal Demo Standard".


Friday, January 30, 2009

Genesis - A starter theme for Drupal 6


Genesis is a starter theme for Drupal 6 and is an ideal way to get started building your own Drupal theme. Similar to other frameworks the idea is to build a subtheme. A starter subtheme is included in the download. Using a starter theme makes building a theme faster and easier than starting from scratch.


Genesis Subtheme demo site. View the un-styled subtheme and use the theme switcher to view demos of the pre-built subthemes as well.


Main Features:


  • Provides easy sub theming.

  • 7 easy to use layouts included - view screenshots.

  • Use a different layout for each page-xxx.tpl.php file.

  • Fluid or Fixed width.

  • Built in snippets for aligning Primary & Secondary links center or right.

  • Additional regions - see a visual rendering of page.tpl.php.

  • Elastic design - all values in ems.

  • All core CSS is abstracted into mini-stylesheets, allowing you to unset what you don't need.

  • Prints many conditional CSS classes to make themeing easier - body, page, node, comment, block, header & nav classes.

  • genesis_LITE sub-theme - a lite-weight version with much less HTML.

  • Tested in all A grade browsers, including IE6.

  • Many comments included in the CSS and templates.


You must first download Genesis and install it in your Drupal site, then add the subthemes.

Saturday, January 24, 2009

Drupal 6 Hooks

hook_menu_alter(&$callbacks)
Alter the data being saved to the {menu_router} table after hook_menu is invoked.This hook is invoked by menu_router_build(). The menu definitions are passed in by reference. Each element of the $callbacks array is one item returned by a module from hook_menu. Additional items may be added, or existing items
altered.

hook_mail($key, &$message, $params)
Prepare a message based on parameters. @see drupal_mail for more.

hook_watchdog($log_entry)
Log an event message. This hook allows modules to route log events to custom destinations, such as SMS, Email, pager, syslog, ...etc.

hook_theme($existing, $type, $theme, $path)

Register a module (or theme's) theme implementations.

Modules and themes implementing this return an array of arrays. The key to each sub-array is the internal name of the hook, and the array contains info about the hook.

hook_theme_registry_alter(&$theme_registry)

Alter the theme registry information returned from hook_theme().

The theme registry stores information about all available theme hooks, including which callback functions those hooks will call when triggered, what template files are exposed by these hooks, and so on.

Note that this hook is only executed as the theme cache is re-built. Changes here will not be visible until the next cache clear.

hook_boot()

Perform setup tasks. See also, hook_init.

This hook is run at the beginning of the page request. It is typically used to set up global parameters which are needed later in the request.

Only use this hook if your code must run even for cached page views.This hook is called before modules or most include files are loaded into memory. It happens while Drupal is still in bootstrap mode.

hook_form_FORM_ID_alter(&$form, &$form_state)

Provide a form-specific alteration instead of the global hook_form_alter().

Modules can implement hook_form_FORM_ID_alter() to modify a specific form, rather than implementing hook_form_alter() and checking the form ID, or using long switch statements to alter multiple forms.

Note that this hook fires before hook_form_alter(). Therefore all implementations of hook_form_FORM_ID_alter() will run before all implementations of hook_form_alter(), regardless of the module order.

hook_term_path($term)

Allows modules to provide an alternative path for the terms it manages.

For vocabularies not maintained by taxonomy.module, give the maintaining module a chance to provide a path for terms in that vocabulary.

"Not maintained by taxonomy.module" is misleading. It means that the vocabulary table contains a module name in the 'module' column. Any module may update this column and will then be called to provide an alternative path for the terms it recognizes (manages).

This hook should be used rather than hard-coding a "taxonomy/term/xxx" path.

hook_locale($op = 'groups')

Allows modules to define their own text groups that can be translated.

hook_schema()

Define the current version of the database schema.

A Drupal schema definition is an array structure representing one or more tables and their related keys and indexes. A schema is defined by hook_schema() which must live in your module's .install file.

By implementing hook_schema() and specifying the tables your module declares, you can easily create and drop these tables on all supported database engines. You don't have to deal with the different SQL dialects for table creation and alteration of the supported database engines.

hook_system_info_alter(&$info, $file)

Alter the information parsed from module and theme .info files

This hook is invoked in module_rebuild_cache() and in system_theme_data(). A module may implement this hook in order to add to or alter the data generated by reading the .info file with drupal_parse_info_file().

Sunday, January 11, 2009

OOP Concepts in Drupal

Despite the lack of explicitly-declared classes in Drupal, many
object-oriented paradigms are still used in its design. There are many sets
of "essential features" that are said to be necessary to classify a system
as object-oriented; we will look at one of the more popular definitions and examine some ways in which Drupal exhibits those characteristics.


Objects


There are many constructs in Drupal that fit the description of an
"object". Some of the more prominent Drupal components that could be
considered objects are modules, themes, nodes, and users.


Nodes are the basic content building blocks of a Drupal site, and
bundle together the data that makes up a "page" or "story" on a typical
site. The methods that operate on this object are defined in node.module,
usually called by the node_invoke() function. User objects similarly
package data together, bringing together information about each account on
the site, profile information, and session tracking. In both cases, the
data structure is defined by a database table instead of a class. Drupal
exploits the relational nature of its supported databases to allow other
modules to extend the objects with additional data fields.


Modules and themes are object-like as well, filling the "controller"
role in many ways. Each module is a source file, but also bundles together
related functions and follows a pattern of defining Drupal hooks.


Abstraction


Drupal's hook
system
is the basis for its interface abstraction. Hooks define the
operations that can be performed on or by a module. If a module implements
a hook, it enters into a contract to perform a particular task when the
hook is invoked. The calling code need not know anything else about the
module or the way the hook is implemented in order to get useful work done
by invoking the hook.


Encapsulation


Like most other object-oriented systems, Drupal does not have a way of
strictly limiting access to an object's inner workings, but rather relies
on convention to accomplish this. Since Drupal code is based around
functions, which share a single namespace, this namespace is subdivided by
the use of prefixes. By following this simple convention, each module can
declare its own functions and variables without the worry of conflict with
others.


Convention also delineates the public API of a class from its internal
implementation. Internal functions are prefixed by an underscore to
indicate that they should not be called by outside modules. For example,
_user_categories() is a private function which is subject to change without
notice, while user_save() is part of the public interface to the user
object and can be called with the expectation that the user object will be
saved to the database (even though the method of doing this is
private).


Polymorphism


Nodes are polymorphic in the classical sense. If a module needs to
display a node, for example, it can call node_view() on that node to get an
HTML representation. The actual rendering, though, will depend on which
type of node is passed to the function; this is directly analogous to
having the class of an object determine its behavior when a message is sent
to it. Drupal itself handles the same introspection tasks required of an
OOP language's runtime library.


Furthermore, the rendering of the node in this example can be affected
by the active theme. Themes are polymorphic in the same way; the theme is
passed a "render this node" message, and responds to it in a different way
depending on the implementation of the active theme, though the interface
is constant.


Inheritance


Modules and themes can define whatever functions they please. However,
they can both be thought to inherit their behavior from an abstract base
class. In the case of themes, the behavior of this class is determined by
the functions in theme.inc; if a theme does not override a function defined
there, the default rendering of an interface component is used, but the
theme can instead provide its own rendering. Modules similarly have the
selection of all Drupal hooks to override at will, and may pick and choose
which ones to implement.

Better Select module in Drupal


Multiselect HTML select elements are hard for users. Selecting more than one requires Ctrl+clicking (or Cmd+clicking on Macs) and explaining this to users who sometimes have trouble even clicking the mouse at all is no one's idea of fun.

Better Select module overrides all multiselect HTML elements in Drupal and replaces them with checkboxes, in an auto-scrolling div so they don't take up much room on the page.

This module can be downloaded from http://drupal.org/project/betterselect

Sunday, January 4, 2009

Creating views for custom tables in Drupal 6


At a minimum, if your module wants to use Views, it needs to implement one hook:


function hook_views_data();


This function returns data that will describe how your module's tables relate to the Drupal node table, as well as what fields can be displayed and sorted, and how your tables may be filtered. This hook can return just one or many tables. This function should be placed in a file named MODULENAME.views.inc in your module's directory. Views will automatically find it and include it when necessary.

If you want to provide default views that your users can immediately use, implement hook_views_default_views(). You can use the views exporter tool to create this hook. This hook should be placed in MODULENAME.views_default.inc.

Implementation steps

1.Implement the hook_views_api() in your module.


function MODULENAME_views_api() {
return array(
'api' => 2,
'path' => drupal_get_path('module', 'MODULENAME') . '/modules',
);
}


2. Create a file named MODULENAME.views.inc and put it in your modules diretory.
/sites/all/modules/MODULENAME/modules/MODULENAME.views.inc

3. This .inc file must implement the hook_views_data() and the sample impelemntation is given below.

function custom_views_views_data() {

$data['custom_views']['table']['group'] = t('Custom View');

// Here 'custom_views' will be your table name and this will be treated as base table
$data['custom_views']['table']['base'] = array(
'field' => 'id',
'title' => t('Custom table'),
'help' => t('Stores information about custom table.'),
'weight' => 10,
);
// Following are the fields of the table 'custom_views'
// Field:custom_id
$data['custom_views']['custom_id'] = array(
'title' => t('ID'),
'help' => t('ID of the custom table.'),

'field' => array(
'handler' => 'views_handler_field',
'click sortable' => TRUE,
),
'filter' => array(
'handler' => 'views_handler_filter_string',
),
'argument' => array(
'handler' => 'views_handler_argument_string',
),
'sort' => array(
'handler' => 'views_handler_sort',
),
);

// Field:custom_title
$data['custom_views']['custom_title'] = array(
'title' => t('Name'),
'help' => t('Name of the field.'),

'field' => array(
'handler' => 'views_handler_field',
'click sortable' => TRUE,
),
'filter' => array(
'handler' => 'views_handler_filter_string',
),
'sort' => array(
'handler' => 'views_handler_sort',
),
'argument' => array(
'handler' => 'views_handler_argument_string',
),
);
return $data;
}

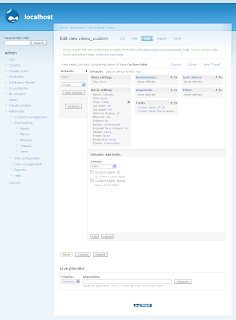
Now when you create a new view, the custom fields will be included in the view.

For more information on views2 visit on http://drupal.org/node/235062